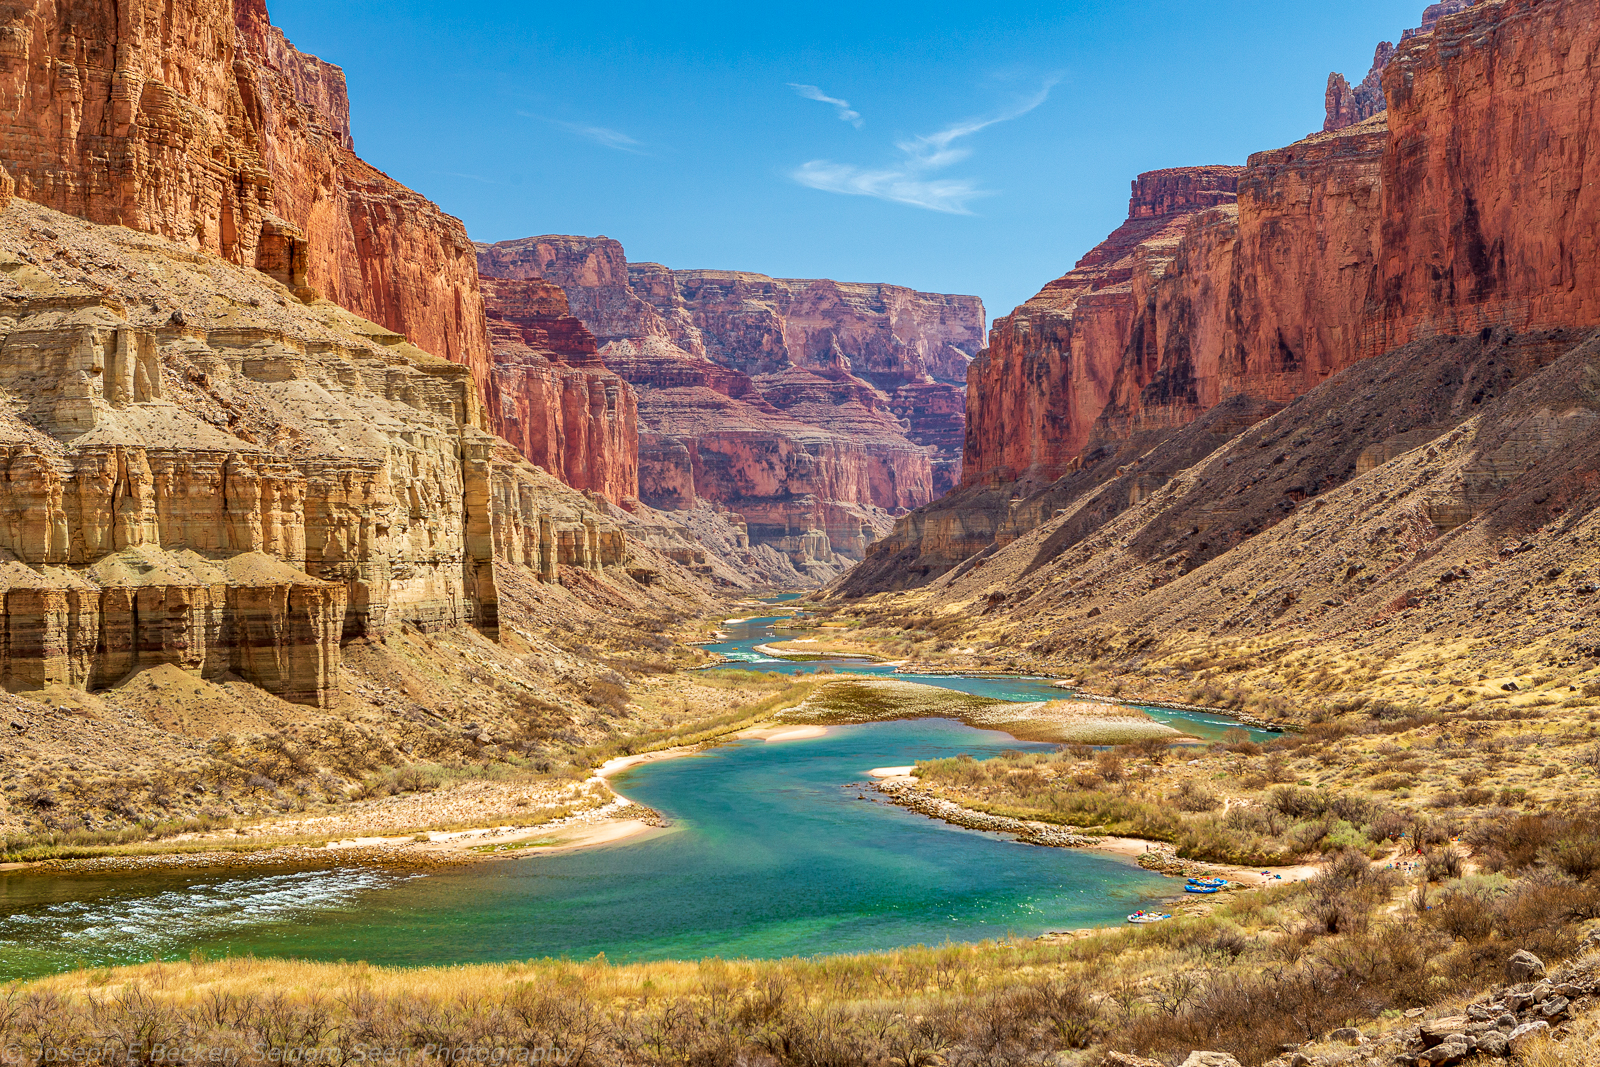

It’s hard to believe I haven’t yet posted this year; not that I’ve done that much to post about, except for one big trip – a raft trip through the Grand Canyon. Back in March, I took a 17-day private rafting trip through the Grand Canyon. I’ve rafted the Grand Canyon before, but it has been over 30 years, so I was excited to go and anticipated doing some great photography, and I do think I came away with some very good shots.
The hardest part about rafting the Grand Canyon, at least on a private trip, is getting the permit. Permits are handed out through an on-line lottery. Each year, in February, the Park Service holds a weighted lottery for permits for the following year, as explained here. The chances of getting a permit for any one person is pretty slim. Both Tanya and I have put in for a permit almost every year for the past dozen years or so and have never been selected. However, we do so as part of a group of people lead by a buddy of mine who tries to score a permit every year. Last year, two member of the group got permits for March of 2021. So we were in. Each permit is good for up to 16 people. COVID messed things up a bit, and only 19 people ended up going on the trip (Tanya being one who did not go).

Of course, you can always go on a commercial trip, but they are quite a bit more expensive and you have have less freedom for photography unless you book one specially tailored for photographers (a good, but expensive, option).
It may be different when your trip is on a large motorized raft, but my advice is tailored to riding on small (14-18 foot) oar boats, which typically have one or two passengers in addition to the boatman (not always a man, but in my experience always called a boatman) on the oars. These smaller rafts work great for photography because it’s easier to take shots on the water without getting a piece of the raft in your composition and often the boatman will help out with your photography (positioning the raft, volunteering to go in a second group of rafts through a rapid so you can shoot the first group, etc.).
Once you book your trip, you will need to figure out how to keep your camera gear safe from sand and water. You will get wet, even on days without big rapids, so how do you keep your camera dry? The main two options are ammo cans or Pelican (or similar) cases. Some people may also use dry bags, but I don’t recommend these as they are difficult to seal properly, especially if you are in a hurry to seal your gear before an upcoming rapid. Pelican cases have the advantage over ammo cans of being easier to open and shut, having your gear better organized, and (depending on size) carrying more gear. However, while both ammo cans and Pelican cases can leak, personally I trust an ammo can more than a Pelican case. On my recent trip, our raft flipped and all my gear spent about 20 minutes underwater. My two ammo cans, which were carrying my camera and lenses, were completely dry inside. My Pelican case, which carried some spare batteries, books, my journal, and assorted other odds and ends, leaked. Not a lot, but things were wet. Others have told me told me similar stories.
However, there are those that prefer Pelican cases (like Laurent Martres, as he describes in his Arizona photography guidebook). And reportedly, on commercial trips you may not have full access to your ammo can when on the boat. What you use to carry your gear is an important consideration and you should talk with your trip leader or commercial outfitter about what will work best for your individual situation.
While ammo cans come in varying sizes, there are only one or two sizes that work well for quick access: the 50mm size and the fat 50mm size. I used a fat 50, in which I could fit my camera body with the 24-70mm lens, by 14-40mm lens, a spare battery, and some odds and ends like sunscreen, lip balm, etc. I also used a large ammo can to carry my 70-200mm lens and my 150-600mm lens. This larger can was not accessible when on the boat, though I could access it when we made stops during the day. I also had a day pack available at all times, but didn’t keep any camera gear in it as it typically got quite wet each day. I carried several small dry bags inside the backpack to hold extra clothes, my running shoes (to use on hikes), etc. These could also be used to carry an extra lens when hiking.

While I took four lenses, most photographers will be happy with two, a 24-70mm and a 70-200mm or similar. I rarely used the wide-angle zoom, and the big telephoto I mainly used for shooting rafts going through rapids; however, several rapids I shot could easily be done with the 70-200mm lens.
Whether using ammo cans or a Pelican case, you will want to make sure it is well strapped in on the raft. Your boatman should have straps you can use to strap you can or case to the frame of the raft. When accessing your camera when floating, I like to loosen the strap, but not totally remove it, and close the can/case after removing my camera. You never know when you might accidently bump your case and send it over the side.

In addition to your main camera, you might want to also carry a small waterproof camera for shooting when in the rapids, or get a waterproof case for your phone and use its camera. I wish I had done one of these, but did not and missed out on some fun action shots.
Speaking of phones, many people use their phones as their main (and only) camera. I considered bringing my phone as well, but didn’t because of needing to charge it each night. You will need to consider how to keep your camera batteries charged. I carried six batteries for my Canon 6D, as well as five power packs to recharge them (three of my power packs were my drone batteries with a special connector; they hold a lot of power and were very handy). I ended up not needing that many power packs, but I really didn’t want to run out of juice.
You should also consider image backups. I took a risk and didn’t back up my images on the trip. I brought a lot of SD cards, and normally didn’t use any one card more than a couple days before switching to a new card. That way, in case any one card became corrupted, I wouldn’t lose all the images from the trip.
Two people on my trip had Go-Pros which they attached to the top of their helmets (while life jackets are required when on the river, helmets are optional and most people do not wear them, especially at normal water levels. The water level was very low for a portion of our trip, causing more rocks to be present in the river, and about half the people on the trip wore helmets at least part of the time.) We saw several other trips that had Go-Pros attached to rods above the back of their rafts. If you take a Go-Pro, you should attach it with an extra strap just in case the primary connection breaks. You may also consider attaching a float. One of the people with a go-pro on our trip was in a raft that flipped in Crystal Rapid. He swam most of the rapid, and when finally was rescued and pulled over to the river bank, he said “at least I got some good video” as he patted the top of his helmet to find the Go-Pro gone.
Tripods are a must for serious photography. However, on a raft trip, most of your gear is stowed during the day and not accessible. That includes tripods. I used my tripod extensively when we were camped for the night, but didn’t have access to it during the day, including on stops and day hikes. I suggest bring a tripod, and you may be able to work out a deal with your boatman to keep it accessible during the day, but don’t bet on it.
All raft trips start at Lee’s Ferry (except for some commercial day trips that start at Diamond Creek and only see the very end of the canyon), but can have varying lengths. Some people chose to hike in or out at Phantom Ranch via the Bright Angel Trail. Some of the best photography, in my opinion, is upstream from Phantom Ranch, so I suggest starting your trip from Lee’s Ferry. The various take outs include Whitmore Wash (river mile 188), Diamond Creek (river mile 226), and Pearce Ferry (river mile 280). Most commercial trips take out at Whitmore or Diamond Creek. Out trip continued on to Pearce Ferry. There is an additional take out below Pearce Ferry, but it is no longer recommended due to the new Pearce Ferry Rapid, which recently formed when the river cut through old Lake Mead lake bottom sediments (the water level in Lake Mead has dropped considerably in the past several decades, exposing the old lake bottom) and is considered not runnable.
I’ll follow up this post with suggestions for specific recommendations for photography in the canyon, so stay tuned.

Leave a Reply