 One of the challenges of shooting in RAW format is deciding what and how much processing to do. (Tangent – why is RAW capitalized? It is not an acronym such as JPEG or TIFF. It simply means unprocessed. In Wikipedia, it isn’t capitalized. But somehow, it doesn’t look right to me. I’m usually a stickler for correct writing – just ask anyone at my day job where I edit everyone’s reports; they may even call me a grammar nazi – but leaving it uncapitalized when every other file format is capitalized seem wrong. So grammar nazi or not, I’m capitalizing it.) When shooting in JPEG mode, the camera does the processing for you. You can always tweak it later, but the majority of the work is done. With RAW, you should do the heavy lifting and process the image yourself, at least if the default processing by your RAW converter program (Lightroom in my case) doesn’t do a good job. And it is rare when I find I can’t do a better job processing than the default.
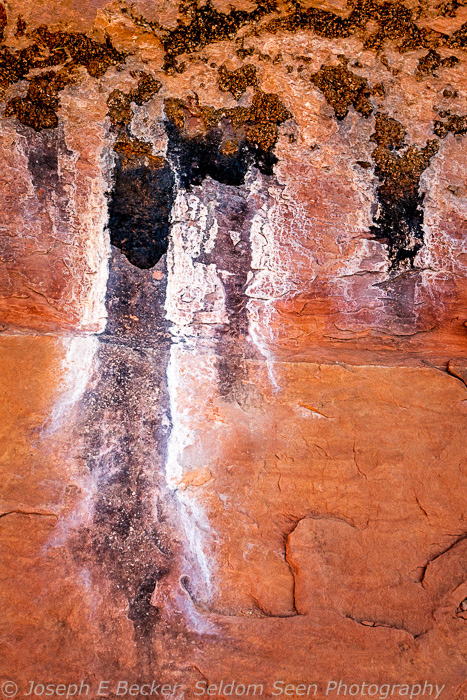
But the question remains, what to do and how much? Some might answer, just enough so that it looks like it did in real life. But what is that? Take, for example, the images presented here. These are shots of water seeping out of sandstone near Moab, Utah. I’ve included both my processed versions and the original RAW versions from Lightroom with zeroed developing (with all the sliders set to zero – realize, however, there still is some processing involved, it is impossible to present true RAW images, some processing must occur to translate the images into something humans can view). I took these images in the shade on a sunny, blue-skied morning. So these were naturally lit by a broad, blue sky, which cast a rather flat, blue light onto the sandstone. Does that flat, blue light truly show what I saw, or do my processed versions show what I saw? The answer is up to me as the maker and you as the viewer. Did I go too far?
Well, what did I do to turn the RAW images into the finished images? They were first processed in Lightroom, correcting for lens distortion and chromatic aberration. Then I set the white point and the black point to add contrast, took a little off the exposure, and adjusted the highlights and shadows to bring detail into the blacks and whites. I added some clarity to add a bit of sharpness and some vibrance to add saturation. I then adjusted the color temperature, increasing it to remove the blue tint. I then added a radial filter to lighten the water patterns and darken the rest. And finally, made minor changes to many of these adjustments to fine tune them. I then took the images to Photoshop, performed Tony Kuyper’s triple play to add punch to the highlights and shadows, lighten up the orangy-browny vegetation on top, and added a “smart glow” to punch up the color a bit. In total, it took about 10 minutes each to do all this work.
I’d think the most controversial of these changes would be the changes to the color, in particular adding vibrance and the smart glow. The rest is pretty standard old-school darkroom photography made digital (except perhaps the Kuyper triple play, that doesn’t really change the images that much). The problem here is deciding what is too much in terms of the color. Because the subjects were in shadow, it is difficult to determine what the colors would look like in the sunshine. And of course, what sunshine are we talking about? Sun at noon? Sun at sunset?
I guess the answer is it depends. Did I take it too far? I don’t think so; you may. But these are close to what I wanted to show when I took the images. So for me, the answer is no; I processed them as I thought proper. For you the answer may be different. If you think so, let me know your thoughts.


Leave a Reply