New Transform in Lightroom

151214_Paris_8008


Adobe added a new Transform panel in Lightroom CC in June, and since I typically don’t check what is new in each Lightroom upgrade, I didn’t see this new panel until last month. When I did find it, I thought it was amazing. So much so, that from now on, I’ll be checking each upgrade to see what other new features might be available to improve my workflows.

The old transform was under the Lens Correction panel in the Develop Module under the Manual tab, where there were sliders for you to manually adjust lens, vertical, and horizontal distortions; rotation, scale, and aspect ratio. I made wide use of the vertical and horizontal sliders, but not so much the others. I found it was easier to correct rotations or change the aspect ratio with the crop tool and I usually don’t change the scale of an image except upon export. And while these transform tools where very helpful, sometimes I couldn’t get the results I wanted.

With release 2015.6 of Lightroom, Adobe removed the manual transform sliders from the Lens Correction panel and placed them in a new Transform panel (located directly underneath the Lens Correction panel, see the first screenshot below). The lens distortion slider is gone, and two new sliders, for X and Y offsets, are added. But the best new feature is the addition of automatic or guided distortion corrections. There are six options: off, auto, guided, level, vertical, and full. The pop-up help in Lightroom for each of these options states:

  • Auto: “enables balanced level, aspect ratio, and perspective corrections”
  • Guided: “draw two or more guides to customize perspective corrections”
  • Level: “enable level corrections only”
  • Vertical: “enable level and vertical perspective corrections only”
  • Full: “enable full level, horizontal, and vertical corrections”

There is also a guide tool in the upper left-hand corner with a guide tool. This tool essentially works identically to pressing the Guide button. In both cases, a guide tool becomes active which allows you to place guides on the image to show Lightroom what should be level and vertical. You are allowed to add up to four guides.

I’ve illustrated the use of this new features with an image I took in Sainte-Chapelle in Paris last year. The space is small and crowded, tripods are not allowed, and a wide-angle lens is needed. These conditions make it quite hard to a decent level and perspectively correct shot. The original image, shot with my 28-300mm zoom lens set at 65mm (at 1/20 second, f5.6, ISO 6,400),  is shown here below after all Lightroom corrections except those under the Transform panel.

The original shot, not level and plenty of vertical distortion

The next image, below, is a screenshot showing the Transform panel open in the Lightroom Develop module. No transform corrections have been selected – the Off button is active. Please note, that when using the Transform corrections, it is best to have the lens profile corrections already active in the Lens Corrections panel.

The image in Lightroom Develop module with the Transform panel open.

The images below are the results of selecting the Auto, Level, and Vertical buttons. In this case, the results from the Full button is identical to the Vertical button.

Image after selecting the Auto button
Image after selecting the Auto button – improved, the image is almost (but not quite) level, and the vertical perspective is improve but far from perfect
Image after selecting the Level button
Image after selecting the Level button – nice job on leveling, vertical perspective unchanged from original
Image after selecting the Vertical button
Image after selecting the Vertical  or Full buttons (without cropping) – better than the Auto button, both horizontal and vertical perspectives well corrected, though not perfectly

Below I show the steps in using the Guided correction either by guide tool or selecting the Guided button.

Guide tool in use, picking two spots to define, in this case, a horizontally level line. The tool opens up a zoom window to allow the exact placement of the two spots.
Guide tool in use, picking two spots to define, in this case, a horizontally level line along the base of the altar. The tool opens up a zoom window to allow the exact placement of the two spots.
Here I've placed a second guide, this one defining a vertical line. With the placement of the second guide, the image adjusts. If it is still not satisfactory, a third and fourth guides can be added.
Here I’ve placed a second guide, this one defining a vertical line along the left-hand stained glass window. With the placement of the second guide, the image adjusts. If it is still not satisfactory, a third and fourth guides can be added.
Here a third guide has been added, creating a further correction.
Here a third guide (another vertical one, this one along the right-hand window) has been added, creating a further correction.
And now, a fourth guide, in this case, another horizontal one.
And now, a fourth guide, in this case, another horizontal one at the top of the altar. Now the image shows a better correction than any of the automated buttons. Results, of course, depend greatly on the selection and placement of the guides.
You have the option of checking the Constrain Crop checkbox at the bottom of the panel. This crops off the white space created by the corrections, but often it does not do a very good job as was the case here.
You have the option of checking the Constrain Crop checkbox at the bottom of the panel (this works with any of the buttons, not just the Guided one). This crops off the white space created by the corrections, but often it does not do a very good job as was the case here.
Instead you can use the crop tool, shown here, and adjust the cropping for a better composition. Here the crop tool was locked to the original aspect ratio.
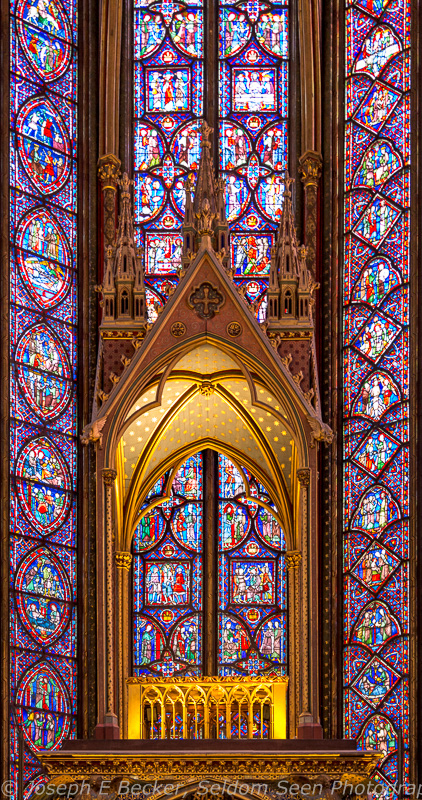
In this case, I wanted to show more of the stained glass windows, so I unlocked the aspect ratio and extended the crop upwards to make a vertical panorama. This crop resulted in my finished and featured image at the top of the post.


Comments

3 responses to “New Transform in Lightroom”

  1. Jane Lurie Avatar

    What an informative and well-written post, Joe. Thanks so much. Wonderful image, too.

    1. joebecker Avatar

      Thanks for you kind words Jane.

  2. The Gray Bull Avatar

    Great photo and explanation of the use of this tool. Thanks!

Leave a Reply

Your email address will not be published. Required fields are marked *