 My intention this morning was to get a lot of work done. Instead, I sat down at the computer and played with Photoshop. I long have wanted to learn how to create the tilt-shift look in Photoshop. You know the look, that of a miniature toy town or city. So instead of working, I asked Mr. Google how to do it, and he directed to a tutorial by Denise Lu. It is quite easy.
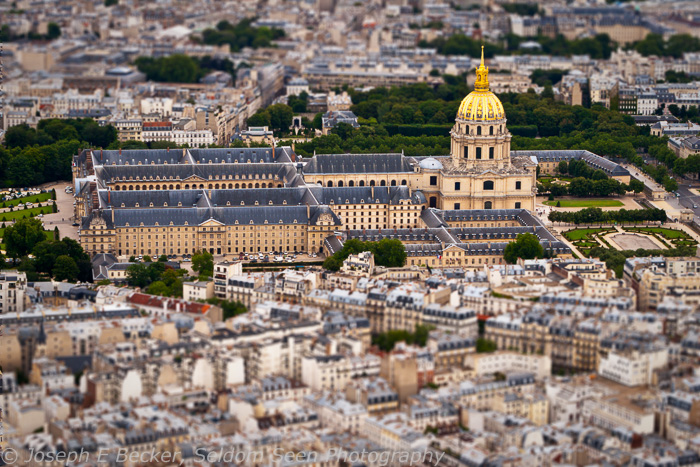
1. Pick a photo. It seems to work best with a wide view, taken from a high angle so you are looking downward on the scene. Two of the images here were taken from the Smith Tower in Seattle and the third from the Eiffel Tower in Paris.
2. Open the photo in Photoshop and create a duplicate layer so you are not working on the background layer.
3. Enter the Quick Mask Mode (the shortcut is the Q key) and select the Gradient tool. With the gradient tool, select the reflected gradient (the 4th mode over on the gradient tool bar).
4. Draw a gradient starting in the area you want to be in focus and extending to the area out of focus. You can hold the Shift key down to make sure your gradient is straight. A mask (default color red) will appear on the screen showing the area to be in focus. You will likely have to play around with it to get a mask exactly where you want it.
5. Exit the Quick Mask Mode (hit the Q key again) and from the filter pull-down menu select the Lens Blur filter.
6. Pick a radius of somewhere between 20 and 40, at least those are the values I used. The Lens Blur filter screen will let you preview the results.
7. Consider adding saturation with a Hue/Saturation adjustment layer and extra contrast with a Levels or Curves adjustment layer to make the result look for toy-like.
And that’s it! The hardest part is getting the gradient in the proper place. If you have a building sticking out of the in-focus area, such as in my image of Paris here, you can use other selection tools to de-select that portion of the building after leaving the Quick Mask Mode but before applying the Lens Blur filter.
Have fun!


Leave a Reply