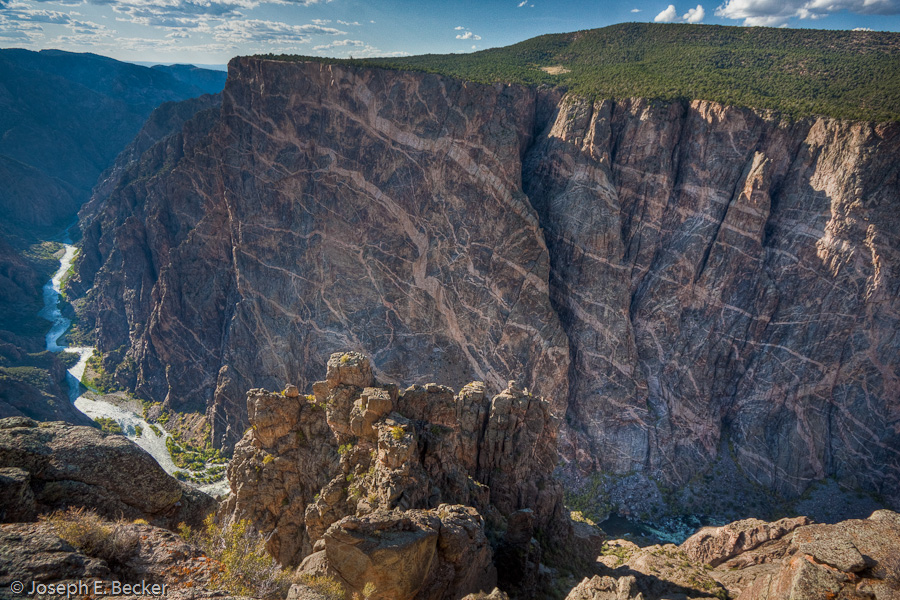

One stop Tanya and I made on our trip last month was the Black Canyon of the Gunnison National Park in Colorado. This is an amazing place. At its deepest, the Black Canyon is 2,722 feet (829 meters) deep. At its narrowest, it is 1,100 feet (335 meters) wide. It is so deep and so narrow, that little sunlight reaches the bottom. No wonder it is called Black. Of course, this presents great difficulties in photographing it.

Our original plan was to spend a night at the campground at the park. So I spent a lot of time studying various viewpoints and sunlight times and angles (using the Photographer’s Ephemeris, which is a really great program by the way, and free for desktop or laptop use) for early morning and late afternoon of our projected days at the park. As is turned out, we only made a short stop there, maybe two or three hours in the brutal, mid-afternoon sun. Not the best conditions for photography. The range of contrast was huge – puffy white clouds to dark, canyon shadows. The rock making up the canyon is mostly dark; that didn’t help. And several of the viewpoints we visited looked westward, toward the sun. Ouch! Could conditions be worse?
What’s a photographer to do? HDR of course. (For those of you who don’t know, HDR stands for high dynamic range. HDR photography works by shooting the same scene several times with different exposures and combining them together in a computer.) I occasionally shoot with HDR in mind, and this was one of those occasions. All the images presented in this blog are HDR images.
For those who care about such things, my typical HDR workflow is thus: 1) shoot three shots (or more if needed) in RAW using the autobracket feature on my DSLR (tripod mounted of course), 2) upload into Adobe Lightroom, 3) in Lightroom, on one of the shots, set the white balance and correct for chromatic aberration, then copy those settings to the other shots in the set, 4) export to Photomatix Pro using the Details Enhancer for tone mapping , 5) save the new HDR image and import into Lightroom, 6) go through my normal Lightroom workflow I normally use for RAW photos, and 7) give finishing touches (if needed) in Photoshop. The images here have been through steps 1-6. When shooting the original images, I check the histogram to make sure the set of images includes at least one image with the histogram not pegged up against the right side and at least one image with the histogram not pegged up against the left side.
Normally, I don’t use HDR if I can preserve the entire dynamic range with my regular workflow. Two of the images presented here that I was able to use my non-HDR workflow. However, I ran them through my HDR workflow to see how they looked and thought they looked better with HDR.
I’m not a fan of that over-processed HDR look that is popular with some. I like my HDR images to look life-like. A couple of these push that envelope, particularly the one with the Painted Wall below. What do you think? Are any of them overdone?


Leave a Reply